

Why Proper Shower Drainage Matters
A well-built shower drainage system isn’t just about convenience—it’s essential for the long-term health of your bathroom. Poor drainage can cause water pooling, leaks, mold growth, and even structural damage to your home. On the other hand, a properly installed drainage system ensures water flows quickly and efficiently, keeping your shower clean, safe, and durable.
Common Problems Caused by Poor Drainage
When shower drainage is not done correctly, you might face:
- Standing water that won’t drain properly.
- Slippery surfaces leading to accidents.
- Mold and mildew growth due to dampness.
- Water leakage into adjacent rooms.
- Cracked or lifted tiles from moisture damage.
Planning Your Shower Drainage System
Before jumping into installation, it’s crucial to plan properly.
Assessing Bathroom Layout
- Check the location of existing plumbing.
- Identify the best position for the shower drain (center, corner, or wall).
- Ensure there’s enough slope toward the drain.
Choosing the Right Drain Type
- Center Point Drain: Traditional, placed in the middle of the shower floor.
- Linear Drain: Modern, stylish, positioned along one side or wall, requires consistent slope in one direction.
Understanding Slope Requirements
The golden rule: ¼ inch per foot slope toward the drain.
This prevents water from pooling while ensuring a comfortable walking surface.
Materials & Tools You’ll Need
- Shower drain kit (linear or point drain)
- Waterproof membrane or liner
- Mortar mix (for sloping floor)
- Cement backer board
- Tile adhesive & grout
- Sealant
- Level & measuring tape
- Trowel & mixing bucket
The Right Way  to Create a Proper Shower Drainage System
Step 1: Preparing the Subfloor
- Remove old flooring and check the subfloor for damage.
- Repair or replace weak spots before continuing.
Step 2: Installing a Sloped Mortar Bed
- Apply mortar mix with a slope of ¼ inch per foot toward the drain.
- Use a level to ensure accuracy.
Step 3: Placing a Waterproof Membrane
- Cover the sloped floor with a waterproof liner.
- Extend it 6–8 inches up the wall to prevent leaks.
Step 4: Correct Drain Installation
- Fit the drain tightly into the plumbing trap.
- Seal around the drain with waterproofing material.
Step 5: Sealing Joints & Preventing Leaks
- Apply waterproof tape or sealant around corners and seams.
- Double-check all joints for gaps.
Step 6: Testing the Drainage Flow
- Pour water before tiling to confirm flow.
- Fix any uneven spots immediately.
The Wrong Way  to Build Shower Drainage
Mistake 1: Flat or Uneven Floors
Without proper slope, water stagnates, leading to standing puddles.
Mistake 2: Using Wrong Drain Type
A linear drain requires slope in one direction; using it on a multi-slope floor causes poor flow.
Mistake 3: Poor Waterproofing
Skipping the waterproof membrane leads to leaks, mold, and damaged subfloors.
Mistake 4: Not Testing Before Tiling
If you tile before testing, you’ll have to redo everything if it fails.
Mistake 5: Ignoring Ventilation & Trap Issues
Without proper P-trap and ventilation, sewer gases can escape into your bathroom.
Signs Your Shower Drainage Was Done Incorrectly
- Slow draining water after showers.
- Persistent bad odors from mold or sewer gases.
- Loose tiles from trapped moisture.
- Visible cracks or water damage outside the shower.
DIY vs. Professional Installation
- DIY Approach: Cost-effective, but requires attention to detail. Ideal for handy homeowners.
- Professional Installation: Recommended for large or custom showers where mistakes can be costly.
Maintenance Tips for Long-Lasting Shower Drainage
- Clean the drain cover regularly.
- Use a hair trap to prevent clogs.
- Reseal grout and tiles every 1–2 years.
- Check for leaks periodically.
FAQs About Shower Drainage Systems
Q1. What is the best slope for a shower floor?
A slope of ¼ inch per foot is ideal for proper water flow.
Q2. Can I install a linear drain in a small shower?
Yes, but ensure the slope is in one direction for efficient drainage.
Q3. Do I need a waterproof membrane if I use tiles?
Absolutely. Tiles alone aren’t waterproof—membranes prevent leaks.
Q4. How do I know if my shower drain is clogged or poorly installed?
If water drains slowly despite cleaning, it’s likely a slope or installation issue.
Q5. Can I fix poor drainage without retiling?
Minor fixes are possible, but serious slope errors usually require retiling.
Q6. Should I hire a plumber or a tiler for shower drainage?
Ideally, both—plumbers handle the drain connection, while tilers ensure slope and sealing.
Conclusion: Building a Shower That Drains Properly
Creating a proper drainage system in the shower is all about planning, slope, waterproofing, and correct drain installation. Doing it the right way ensures a long-lasting, leak-free shower. Doing it the wrong way leads to costly repairs, mold issues, and water damage. Whether you go DIY or hire a professional, never skip the testing phase before tiling.
 A well-drained shower is not just about comfort—it’s about protecting your home for years to come.
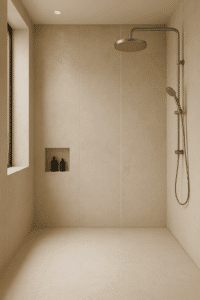
Note: The shower drain is against the wall very tightly, so there is no gap between the wall and floor, just a linear drain.